Tuesday, 21 October 2014

HEAVY WEIGHT ATTEMPT 1

Ahhh...my hands were itching again...just got to bead.

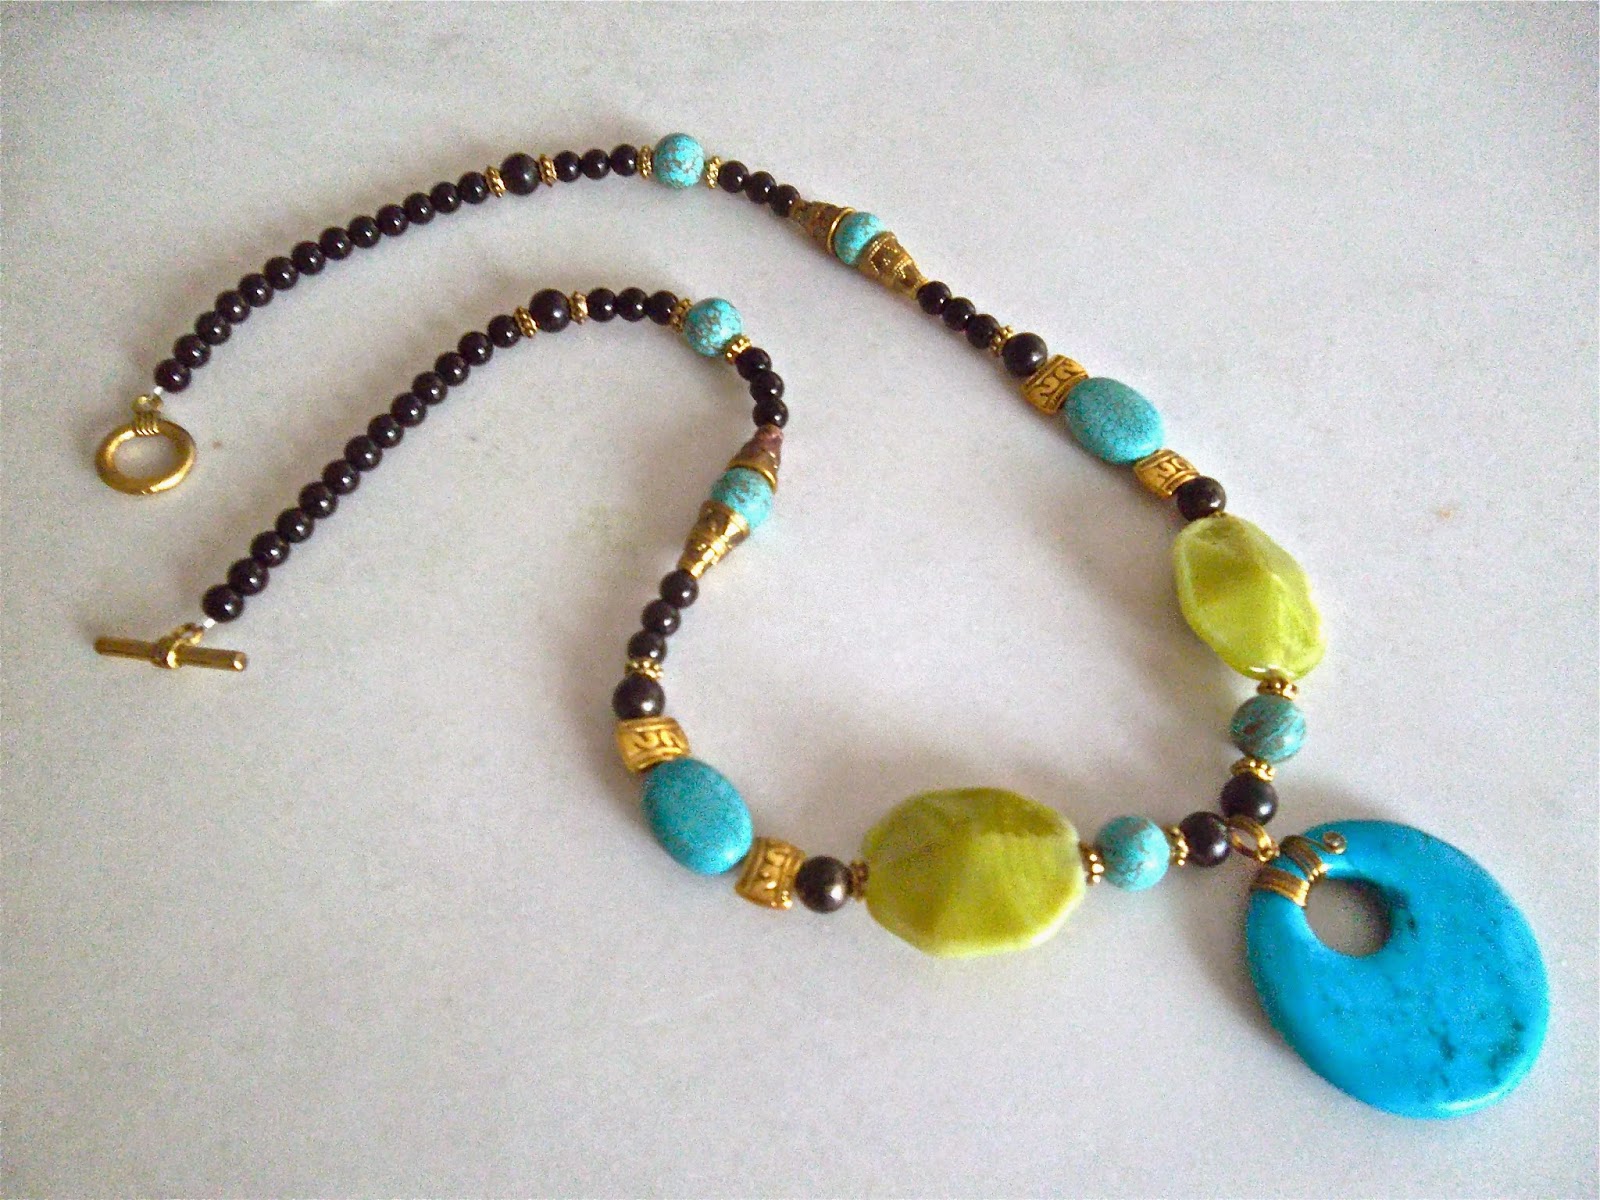
Hmmm...let's see what I've got........got it! I'd try BIG pendant necklace. 

I have never tried stringing with heavy beads.  Should I use Tigertail? Well, I went ahead and gave it a shot.

Here is my first attempt:


Oooo, I really enjoyed the process of beading especially the initial stage of design.  I have got to look at what was available and tried to mix and match.  The second challenge was to think of the technical part.  In this case was making a bail for the pendant.  This was where a little bit of wire wrapping came in.  Hey, I still could do it!

Now that I have gained a little confidence making big necklace of this kind, I will have a second go - perhaps a heavier one.



Wednesday, 22 January 2014

SIMPLY PEARL

Oh my goodness, time flies! It has been almost a year since I last beaded and blogged. Well, it was my choice to have taken up two courses over the past nine months. Priority, priority, priority. No regrets.

Now, back to beading.

I have been commissioned (by my daughter) to reconstruct two of her old pearl necklaces.  I totally stripped of one of them, salvaged only the beads and added new ones to make a long pearl necklace (pic A).  As for the other one, I took out the crocheted flowers and added some new pearls to make a pearl-chain necklace (pic B). These two new pieces can be worn on their own as shown or combined together as one multi-strands pearl necklace (pic C).  How about that?

                                       pic A                                       pic B


pic C


Prior to this project, I have made for myself a simple bold pearl necklace.  "bold" because those are BIG pearls.  See for yourself!


Its bead size is 16mm The one at the foreground is the necklace shown in pic A and the bead size is already 10mm!  The stringing material for this short necklace is tigertail wire. I used seed bead between the beads to prevent the pearl from rubbing against each other. 

By using a decorative clasp, I am able to wear it in different ways:


Hmm....I should have use a bigger clasp to make a statement .....and pearl goes better with gold than with silver.

Lessons learnt. 

Wednesday, 6 February 2013

FEATHER CRAZE

I have been drowning in the sea of chores in the past months and thought beading is going to the thing of the past for me. I dared not even take a glimpse of my beading stuff lest bucket of tears be shed.

I did have pockets of time in between chores but they were not suitable for projects that require new skills or that need designing. I cannot handle both kinds as they require my full focus - that is me. Sigh.

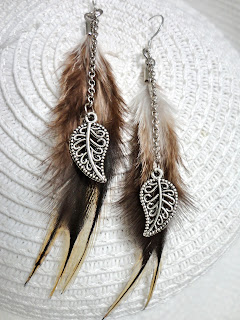
While trying to stay afloat, my daughter Yuan threw me a float so that I could take a breather. She gave me three pairs of feather and requested me to make earrings out of them!

Ha ha ha!!! I was overjoyed because that's an easy task and I was so happy that my hands were dancing with joy.  AND THAT IS WHAT I HAVE MADE:


La la la la.... I am really glad I had the chance to use my beading tools again.  Okay, I now have to get back to reality ..... WORK!


Sunday, 16 December 2012

VIRGIN VIKING KNIT

I was so inspired to try doing the Viking Knit after seeing some of the beautiful work done with this technique some months back.  While still working on the Chunky Green Necklace, I 'bribed'  my friend into making a Wooden Draw Plate for me.  It is a wooden block with holes of different sizes and she has done a good job:


Next, I downloaded an Utube from which I learnt the Viking Knit technique: Viking Knit Jewelry by Gail Nettles.  Finally, I searched for thin wire for the knit and all I could find in my drawers was this roll of guage 30 (I guessed) craft wire.  Ah well, I just went ahead to knit with it and it turned out ugly before drawing it though the Draw Plate:


The knit was quite uneven due to the inconsistent tension of each pull of the wire. Consoling myself that it was a first trial and just a practice round, I kept my finger crossed and pulled the section through the hole of the Draw Plate.  The result was so magical because the imperfection was almost gone and the ugly duckling turned out to be a beautiful chain:


It was like 'Wow, did I really make this?'  After fiddling with it for a while, I found it too thin and light to be worn as a choker/knecklace - lack of substance. I just needed to try again but with thicker wire.

I looked through the storeroom and found this packet of gauge 24 Brass wire and immediately used it to knit without second thought. The 'before drawing' look was still ugly but well, at least the color was pleasing:


I really could not wait for the drawn result and indeed, it did not disappoint me.  I was so pleased with it and went on to add the clasp to make it into a necklace:


ISN'T IT BEAUTIFUL?   Hehe, a pat on the back.

I was quite surprised by the vast difference in theresults by just changing the wire gauge while the other factors remained the same e.g. tightness of knit, number of knit per row ( I used five):


It was quite difficult to knit with gauge 24 as compared to gauge 30 as it was less flexible.  I think being brass and not copper was also part of the reason as it gets hardened easier.  

Hey, wait a minute! Won't brass wire tarnish after some time? Gulp......may be the color will be nicer.....hope so.........

Thursday, 22 November 2012

CHUNKY ORANGE

What a relief! I finally touch base in Singapore after heavy traveling for two months (September and October). Oh, home sweet home!

I have promised myself to do a remake of the CHUNKY GREEN with some changes to make it more wearable.  Tada....here is the new version with an orange bead:


The main difference is in the black weaved rope. I used Cubic Right-Angle Weave (six-bead base) instead of Twisted Herringbone Stitch.  It is indeed more flexible - Thanks Therese for the suggestion!

It was taken on the same day of completion therefore I had no chance to snap some good shots with the camera. At least I managed to take this photo with my Samsung handphone before saying bye-bye to it.  

Hmm...I wish I could have some close-up shots of the wire wrapped bead.  Both sides are equally presentable with similar design. This is slightly difficult to wrap as the holes are at the sides widthwise, unlike the CHUNKY GREEN which has them at the top and bottom.  The challenge was to make it stay put lengthwise and not easily go lopsided.  Ha ha, at least there are holes otherwise it would be challenging.

Hey, the CHUNKY GREEN was also taken and the taker actually preferred it to the orange one. Well,  I guess beauty is in the eye of the beholder.  

Next project - Viking Knit. Wish me luck!


Friday, 31 August 2012

CHUNKY GREEN

While I was still into wiring, I thought of taking up an old challenge: to make a necklace with the big round beads given by SIL and the necklace must not look anything like Buddhist prayer beads. So, simple stringing is out of the question.  It took me nearly two weeks to come out with a design and four days to complete the necklace.  It is not very fantastic but at least it has achieved my intention:

I wire wrapped each and every bead to add some character to them. I added some black round beads to break the monotony.  The green wire wrapped focal bead was added to enhance the look. Below shows the look from both sides of the focal bead:

Well, the wrapping is a bit simple but serves the purpose.  

I could have just used chain for the extensions to complete the necklace but it would look 'cheap'. So, I used Twisted Herringbone Stitch to weave the ropes for the extension and indeed it added some sophistication in it.  A metal clasp may spoil the effect thus I also weaved the clasp with Peyote Stitch to complete the look:

  Hmm...not nicely done being first attempt. Embarrassed.

All seem well but it is not! Design failure! The weaved ropes took 3/4 of the total time to do yet this hard work is not visible on the wearer as it is seated at the back of the neck! What a waste of effort. I should have either

-  weaved a longer extension rope on both sides to make it a longer necklace
or
-  had lesser wire wrapped bead (by two on each side) and longer weaved ropes.

I think I will make another necklace of similar design with the same big round beads but different focal bead.  I may use another stitch for the ropes as I find Twisted Herringbone too stiff and the stitch requires more time to complete the same length as compared to some other stitches.

Hmm...which stitch shall I use?

Thursday, 16 August 2012

MULTI CHAIN BRACELET

While searching through my stash of beads for matching materials for the 'GREEN BRACELET' mentioned in my previous post, I heard these cute little metallic color beads shouting "Me! Me! Me!" How could I resist? So, here they are in this multi chain 'home' I have created for them:

It is a three layer chain bracelet as shown below:
Hehe, can you see the poor cat hanging with one arm? It was salvaged from some old jewelry piece long ago. Hmmm....I think this is also a "GREEN BRACELET"! 

Oh, by the way, I have learnt to use the triangle jump ring in this project. It is used on the tear-drop glass beads in the middle row. Unlike the normal round jump ring, I had to gently pull both ends slightly apart while twisting it open the usual way.  This to create a gap for the tip of the bead to go in between. I am not sure if this is the correct way but it worked.